The trouble with Agile thinking

I work with numerous dev teams and clients in various industries and find that it is extremely challenging for many companies to function in an agile fashion. The trouble is that it is easy for people to talk about and use tools but it is extremely difficult to change behaviour. As a tech person myself I also love the bells and whistles that come with new technology or new approaches to solving problems but all over the world tech people (engineers) are the people that shape the future of the projects and solutions that needs to be built and struggle to change the way they deliver these projects in a way that fits the requirements of the solution rather than fitting their hunger to try new exciting things during the delivery of the task at hand.

When we are empowered by technologies such as VSTS (Visual studio team services) / TFS / JIRA or similar Agile management and delivery software it makes us think that we can now control the outcome of our solutions in a more structured way because we have the tools to make us more agile. We can sit down with business and not commit to timelines because we are sizing the work that needs to happen on complexity and not on commitment of time. We are in control because we determine what happens in the next sprint and we can keep tabs on our progress everyday and in every sprint or release. When something slips we assume the stakeholders will know since they have access to what we can see from a reporting perspective. All of these are part of various topics and aspects we might think about once we are empowered by tools as mentioned , but we forget the most important principles.
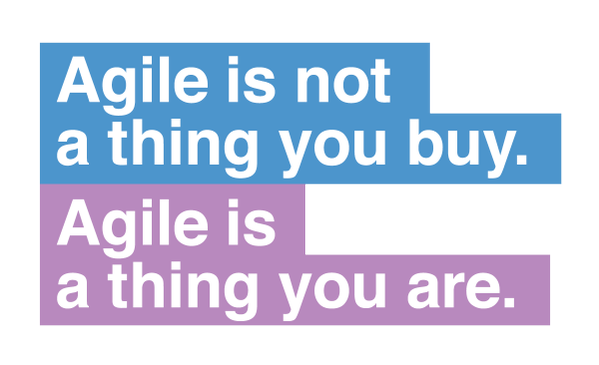
  • Tools don’t make us AGILE  ,Team work does.
  • Being AGILE  does not mean that there is no structure, in fact there is more structure and control than before.
  • Being AGILE  means that we look for opportunity to continuously improve ourselves and our teams and improve the quality of the product and the value that we deliver to our clients.
  • Being AGILE  means that we should communicate about problems when they occur and adapt to them as quickly as possible.
  • Being AGILE  means we need to add value right from the beginning. We should listen to what the client/ product owner requires and not what we think is the best thing to do.
  • Being AGILE  means that you have to share your experience with other. TEAMWORK is a very important important aspect of the success of a project (A team is only as good as the weakest point within it)
  • To be AGILE  you need to be willing to learn things that are outside of your comfort zone because that’s how we improve the team itself and also build contingency for the future
  • To be AGILE you need to be consistent.
  • To be AGILE you need to be focused on the task at hand and not worry about what is coming 6 months along the line.

In my opinion the recipe for being agile is talking a ubiquitous language within your teams so that everybody is on the same wave length when it comes to communication and understanding. Your teams also needs to move away from old ways of thinking and this takes some serious effort from the entire team including both the tech staff and business staff.

The process of becoming AGILE is a learning curve for everyone and remember it does not happen over night. But the most important aspects to remember is that we have to think about PEOPLE FIRST as software and solutions are not built by tools or processes but by PEOPLE.

Share your opinion, I would like to hear what you think

A new leaf

newleaf

I have never been good at writing out the knowledge stuck in my head to share with people, I usually opt for the face to face type conversation to share ideas and thoughts as it is a bit more interactive.I also love presenting at conferences and really engaging with peers and fellow technology enthusiasts but this year however I have decided to try and refresh my Blog by sharing more knowledge on it related to my technical experiences and findings in the field embracing the technology we preach on a daily basis.

In the coming months I will share info around ALM  / AZURE / IOT and various aspects of my technology passion. Stay tuned and remember comments and questions are always welcome.


Microsoft Re-naming Hell

Had to install SSIS dev tools today, and realized that Microsoft has changed the name of the tools to “Sql Server Data Tools” for Visual studio 2012. All nice and dandy, but what they did not tell you is that there are 2 packages that do different things with the same name. aarrrrrgggh.

Soooo, for the people that are looking for the tools formerly known as Business Intelligence studio here is the links to the different products.

Hope this clears up the confusion for some.

Till next time.

Installing Node.js on the Raspberry PI

I’ve been playing with one of my raspberry pi device quite a lot lately and though that it can actually be the perfect little dev server for me as it is quite portable and really powerfull. I bought a multitude of SD sticks for it and even got it to go off a USB flash stick. Its a realy nice tinkerer’s device.

To get straight to the point I though I would share a script I wrote to get the latest node js (Well at least currently version 10.0.5) going on your box. With previous versions you had to compile it on your pi and do all kinds of interesting things to actually get it to compile. They have made it really simple at this point and to get it going , you have to do the following easy steps:
  • You have to download the Pi specific version.
  • You then have to unpack it.
  • You then add it to your bash.rc as an extra path paramater to the extracted node bin path (if your not using bash, it should be similiar in your shell).
And thats it. 🙂
I have also provided the script here to simplify your life.
Hope this helps at least someone out there. Did the trick for me 🙂
#!/bin/bash
#Get all the prerequisites needed
echo "===== Get all pre req's ! ====="
sudo apt-get install python2.7 make
echo "=== Go to the local folder where we will deploy. ===="
cd /usr/local
sudo mkdir node
cd node
#Get the latest version of Node for PI - at this point in time it is 10.5
echo "===== Downloading Node ! ======"
sudo wget http://nodejs.org/dist/latest/node-v0.10.5-linux-arm-pi.tar.gz
echo "===== Unpack the archive ! ====="
sudo tar xvzf node-v0.10.5-linux-arm-pi.tar.gz
echo "===== Rename folder to a simpler name ! ====="
echo "===== (RENAMING THE FOLDER IS OPTIONAL) ====="
sudo mv node-v0.10.5-linux-arm-pi node-v10.5
cd node-v10.5/
#echo "===== Configure it ! ====="
#sudo ./configure
#echo "===== Compile and install ! ====="
#sudo make
#sudo make install
echo "==== Add link to path as v 10.5 is compiled already ====="
sudo echo 'export PATH=$PATH:/usr/local/node/node-v10.5/bin'>> ~/.bashrc
echo"==== Now we will check if it is all there ===="
node -v
npm -v
echo "==== DONE ===="

Entity framework membership and role provider for MVC 3 and bootstrap


I recently started on a new implementation built on Microsoft MVC3. The problem I had was using the ASP.Net role and membership providers that ship out the box. They depend on a database created and configured using the ASP.Net forms auth tools , and sit in there own little database on sql server(or express or compact, whatever you are using). You can get around that by adding your data to the standard created database , but that’s kind of a hack(Not so cool Sad smile )and the fact is that I am using EF-Code first that provides me with some nice features for rapid development and proto typing of needed functionality thus the schema of the database will change quite a lot during the development process.

Digging a bit deeper into the out of the box forms auth , I found that there is also quite a lot of functionality that I would not use and thus the whole idea of using the out of the box forms authentication went out the window. Managing 2 databases (the forms auth one and then my own one) = not cool. Bloated code that has no use in the context = not cool.

So I decided to write my own providers to simplify my life for this project and for future projects with similar requirements (there will be plenty of them I’m sure.) I implemented 2 classes that inherit from the default providers to roll my own simpler authentication namely:

    public class CustomMembershipProvider : System.Web.Security.MembershipProvider   {}
    and
public class CustomRoleProvider : System.Web.Security.RoleProvider   {}
    NOTE: You have to then implement all the base methods from the abstract class inherited from and hook them up to the web.config and controllers, but its left out of this post as it is beyond the point that I am trying to make.
    I hooked it all up using Entity framework for storing the data in my own data structures, replacing the default providers with my own in the configs , and modified the default account controller in the MVC 3 template as provided and SHABANG !!!!!! ALL DONE.
    It all worked like a charm and provided a simplified mechanism with exactly what I needed.I then read up a bit about simple UI and designs for MVC (since I am not a design guru I generally try and see how other people do it Smile) and I came across an article of a gentleman by the name of Ryan Hayes. He has created a nifty little mvc3 template for VS2010 that contains an implementation of the open source EF-Code First Provider  membership provider that does pretty much exactly what I wanted. (Nice timesaver for people interested).
    He also made use of a very nice little framework from the guys at twitter called Bootstrap that helps quite a lot with look and feel for technical people like me. I found it very nice and useful for making your apps look quite slick when you are artistically impaired like myself.

How to make your MAC-OS shell look pretty

If you are from the Linux world or maybe familiar with the Ubuntu shell (or any other distro you prefer) like me, then you would find the Mac OS shell quite dull. It is pretty much black text on a white background by default and that is not always nice when executing commands or when spending some time in the shell. For example , when you run the “ls” command you would like to see the highlighting in differences between files and directories, or read-only and executable files. This functionality is default in Linux but in Mac …….. well……. not so much.

I will explain in some detail in this post how to make your Mac shell a tad more nicer with some colouring via some screenshots taken on my Development box.

(Note: to take screenshots on MAC you can use the following commands :

  • Command-Shift-3: Take a screenshot of the screen, and save it as a file your desktop
  • Command-Shift-4, then select an area to capture and save it to the desktop
  • Command-Shift-4, then space, then click a window and save it to the desktop
  • Command-Control-Shift-3: Take a screenshot of the screen, and save it to the clipboard
  • Command-Control-Shift-4, then select an area and save it to the clipboard
  • Command-Control-Shift-4, then space, then click a window and save it to the clipboard )
  • We first need to open up a terminal and then type in the command to open up the profile file (Very important that if this file does not exist you would have to create it in the root of your home folder). This is done by executing the command “edit ~/.profile”
  • Screen shot 2011-08-12 at 11.03.06 AM

  • You can then add the following exports as depicted in the image below to add colouring to the commands of your terminal for your profile.       Screen shot 2011-08-12 at 11.03.33 AM
  • You can then close your terminal, and open up a new instance.
  • Then run the following command “ls” to see the colouring magic applied on your terminal.
  • This is GREAT, but we are still stuck with the burning white as a background in the terminal. To change this you need to click on the preferences of the terminal once a terminal is open.Screen shot 2011-08-12 at 11.07.35 AM
  • When presented with the preference screen , you can select your theme (mine is set to homebrew) and set that as default.Screen shot 2011-08-12 at 11.08.12 AM
  • Then close your terminal , and open up a new instance.
  • You will then see the colours has changed, and when you run the “ls” command you will see the colouring on terminal commands as well. Screen shot 2011-08-12 at 11.09.00 AM

That’s it for changing your shell to look similar to the Linux one. Have fun , and let me know if you struggle.


NOTE: If my images look funny that’s because I blocked out the computer and user name from the shell with the red block, so yours will definitely look different there. Smile

GIT Tip of the day


I have been using GIT for a while now on my Windows 7 Box,IMac machine and my Ubuntu machine , and have noticed sometimes that you get some issues with different character sets used on the difference platforms.

I had a issue again with a remote repository this morning by receiving the following error when trying to push my source back up to my remote repo :

Warning: LF will be replaced by CRLF in FILENAME

In order to fix this you can run the following command in your git shell on windows or normal shell on Mac and Linux :

git config core.autocrlf false

This will tell git not to try and convert the line-feed characters every time you try and push your source.

On another note , if you are new to GIT or looking for a good open source version control system. I would suggest you look at GIT as a option for your version control system. You can also look at alternatives such as mercurial or the good old svn (sub version) , that I have also found to work quite well for me.(but my personal preference is GIT) I have found that GIT works really good on Mac and Linux, and with  a little bit of effort , it works just as easy on windows, but be warned that the git shell for windows makes use of the Linux command system (Bash shell)


Here is some helpful stuff to get you started on git on the different platforms:

WindowsMac OSXSource

Multiple Platforms

  1. Git user manual
  2. Smart Git Multi-platform client
  3. meld is also good as far us I understand, but haven’t given it a bash yet.

Windows 

Windows Only

  1. Tortoise GIT client for windows
  2. msysgit tools for windows (this is what you need to get going on windows)
  3. BONOBO git server – if your maybe looking at hosting your own repo locally

Mac OSX

Mac Only

  1. Tower client (MAC only) for git (not free but excellent)

Source

Linux Only (Tested on Ubuntu – “WORKS ON MY MACHINE Winking smile“)

  1. giggle client for Linux
  2. Git Cola for Linux
  3. QGit Client for Linux

Running X-Window apps remotely

I’ve been using SSH (Secure shell) for a looooong time on my Linux based systems for remotely controlling my headless servers. During this week I had a guy over at my desk that wanted to have a look at some of my settings on my Ubuntu box to see the difference in configs between what he has done and what I have done differently. I quickly jumped into putty on my windows box (since that is my daily workstation because of VS2010 ) and connected to my server remotely.

Opened up nautilus on linux so I could visually browse to my config files (could have probably done this through shell  too), Nautilus then opened up in my windows OS as any other window would have. Since the other guy has never seen this he was obviously shocked to see the window appearing in my windows environment. I then went off to explain to him how this works and thought that I would share this since a couple of people have asked me “HOW DO YOU DO THAT” before, so here goes.

Remote-X (not the official name I think , but that’s what I call it ) is enabled via ssh or secure shell. SSH is a protocol used to securely access a Unix/Linux machines from another that allows you to run command line and graphical apps remotely and also for file transfers or creating secure networks over the internet to tunnel through(such as a remote http proxy or so). To accomplish this we would need 2 things.

  • Open SSH server for hosting and setting up the secure connection to the linux box that you want to connect to (Thus this runs on the server)
  • SSH client such as Putty to then connect to the server remotely via ssh protocol

Note that is a lot more uses for ssh such as secure ftp connections but I am just going to explain the basics to get a remote connection with openssh and remote X execution from a windows box.

Server Side Setup

First thing to-do is to get Open ssh setup on your Linux box (I am using Ubuntu 10.04 so my commands provided relates to Ubuntu).

Install Open ssh on your Ubuntu box via the following command

sudo apt-get install openssh-server

Once this is done you can change your configs as needed (have a look in the man file. man sshd_config for more info or just lookup sshd on the ubuntu site)

Now we just need to get the openssh daemon running and we’re set on the server side. This can be done with the following command.

sudo /etc/init.d/ssh restart
Client Side Setup

From a client side perspective , most machine would have a client to connect to a server via ssh such as putty. Ubuntu just needs the client downloaded to it and your set, since you have X-server doing all the X windows stuff on ubuntu by default, you won’t have a problem at all in opening the X-apps remotely that sits on your server.To get that client you can simply run the following command and then connect via that client once your set.

sudo apt-get install openssh-client

From a windows perspective, it is a tad more complicated because windows does not make use of the X- server natively for hosting or running its windowing system. In order to get that sorted we must do a couple of things as follows.

    • Download and install X-Ming a X-windowing server for windows.This will provide the capability to windows to run X-window apps within windows.
    • Download and install Putty used for connecting via ssh ( apparently X-ming has a way to connect to a server via ssh with its own mechanisms but I haven’t used that before. I prefer the familiar )

Once these 2 apps are installed you are all set to connect to your server.

Try Connecting ……

To check that the whole process as explained before was successful, we will try and connect to our Linux server over ssh.

    • Run xming and make sure you see the xming icon in your taskbar in the bottom right of your screen.


    • Now run putty and enter your server details

    • Before we connect we need to make sure Putty understands that we want to allow X-window apps to execute. Browse to the SSH settings in putty and expand that. You should see a sub option for X11, open that and then check that the X11 forwarding on the right hand is enabled.

    • You can now click “Open” and you should be connected to your remote server and prompted for the login details of that remote machine

.

    • Once logged in you can try and run a X-App to see that the remote server will then forward the X11 window to your windows machine.I usually run the following command to test: xcalc and will then be presentedwith the XCalc app in your windows environment

.

Sooooo , that’s quite a process on paper, but its actually very simple once you’ve tried it. You can then execute any X-window app remotely with convenience and this is very useful if you have multiple Linux of Unix machines that you work off.

Try this out if you have a remote scenario and let me know if you come right, if you struggle or have some questions.Drop me a comment or question and we’ll take it from there.

Happy computing. Ciao ciao

Scraping the world (How to screen scrape/rip images off the web)

Had to get some info on the web for one of my pet projects recently and found that there was no available web service on the web to provide the data to me that i was in search of. So i decided to look for sites that can provide me with up to date data and then scrape it off there for my own consumption (Not the nicest thing to do I know but it was the only way. Will not mention them at this point). The project consist of 2 parts namely

  1. the scraper service that mines the data and pushes only new relevant data into my data store
  2. The User interface to administer the data and consume it in a functional way.

The idea still hangs around consuming the data in a silverlight application or maybe utilizing asp.net with some other funky features, from WCF REST and DATA SERVICES but the focus is on rapid building as I want to make use of the app quickly but not spend to much time getting it up.

Tech used in scraper so far :

  1. Dotnet 4
  2. SubSonic (Probably one of the best open source projects i’ve used)
  3. Silverlight 4
  4. RegEx and Linq for parsing and getting the “STUFF” in the right format.
  5. SGML Reader Library by Mindtouch to get the HTML well formed
  6. Some other things that I maybe forgot to mention 🙂

Anyhoo, there has been some challenges in scraping the data as a lot of the sites did not comply with XHTML standards, thus making it difficult to consume the data (Hence SGML READER coming to the rescue there). String manipulation is ok to do but I wanted a structured way of working with the data I get back and be able to build queries with the use of linq. So I opted for getting the dat ain well formed XML and then working from there.

Eventually after pulling out the needed info from the xml into a workable object and then pushing that to my store, I moved on to the next task. The data contained URL’s to images that I needed to store within my DB as the APP should not rely on the online images , thus pulling the images off the web and serializing then to binary data and then storing them as an associated record item in the DB. DEFINITELY NOT AS EASY AS I THOUGH. But eventually got it right. Here is a little snippet of converting the image from URL to raw bytes and eventually back when retrieved from the data source.

(NOTE : This is a quick and dirty as I am purely building POC for myself so no guarantees that this will work for you. I am using Log4net so the “_log” references the global object of my application you can take that out and replace error handling in what ever way you need)

Image Manipulation Snippet
  1. ///<summary>
  2.     /// Downloads the image RAW.
  3.     ///</summary>
  4.     ///<param name=”Url”>The URL.</param>
  5.     ///<returns></returns>
  6.     public byte[] DownloadRawImage(string Url)
  7.     {
  8.       Image imageIn = this.DownloadImage(Url);
  9.       MemoryStream ms = new MemoryStream();
  10.       imageIn.Save(ms, System.Drawing.Imaging.ImageFormat.Gif);
  11.       return ms.ToArray();
  12.     }
  13.     ///<summary>
  14.     /// Converts the byte array to image.
  15.     ///</summary>
  16.     ///<param name=”byteArrayIn”>The byte array in.</param>
  17.     ///<returns></returns>
  18.     public Image byteArrayToImage(byte[] byteArrayIn)
  19.     {
  20.       MemoryStream ms = new MemoryStream(byteArrayIn);
  21.       Image returnImage = Image.FromStream(ms);
  22.       return returnImage;
  23.     }
  24.     ///<summary>
  25.     /// Downloads the image.
  26.     ///</summary>
  27.     ///<param name=”Url”>The URL.</param>
  28.     ///<returns></returns>
  29.     public Image DownloadImage(string Url)
  30.     {
  31.       System.IO.Stream webStream = null;
  32.       Image tmpImage = null;
  33.       int retries = 5;
  34.       while (retries > 0)
  35.       {
  36.         try
  37.         {
  38.           // Open a connection
  39.           System.Net.HttpWebRequest httpWebRequest = (System.Net.HttpWebRequest)System.Net.HttpWebRequest.Create(Url);
  40.           if (!string.IsNullOrEmpty(_proxyUser))
  41.           {
  42.             if (!string.IsNullOrEmpty(_proxyDomain))
  43.               httpWebRequest.Proxy.Credentials = new NetworkCredential(_proxyUser, _proxyPass, _proxyDomain);
  44.             else httpWebRequest.Proxy.Credentials = new NetworkCredential(_proxyUser, _proxyPass);
  45.           }
  46.           httpWebRequest.AllowWriteStreamBuffering = true;
  47.           // Request response:
  48.           System.Net.WebResponse webResponse = httpWebRequest.GetResponse();
  49.           // Open the data stream:
  50.           webStream = webResponse.GetResponseStream();
  51.           // convert webstream to image
  52.           if (webStream != null)
  53.             tmpImage = Image.FromStream(webStream);
  54.           // Cleanup
  55.           webResponse.Close();
  56.           retries = 0;
  57.         }
  58.         catch (Exception ex)
  59.         {
  60.           // Error
  61.           _log.Error(string.Format(“Exception caught in process: {0}”, ex.ToString()));
  62.           _log.Info(string.Format(“Retry in process for : {0}”, Url));
  63.           retries -= 1;
  64.         }
  65.       }
  66.      return tmpImage;
  67.    }

The amount of records I had to build from the data scraped is also quite a lot and takes a long time. My plan is to convert some of my scraping code to make use of the parallel framework in .net to see what the impact on the results will be.

Hope this is useful to someone.

Drop me a comment if you found this of interest or you maybe have something similar you are doing.